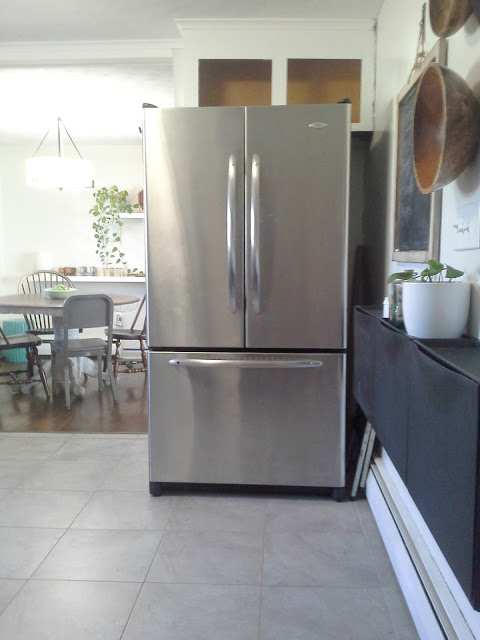
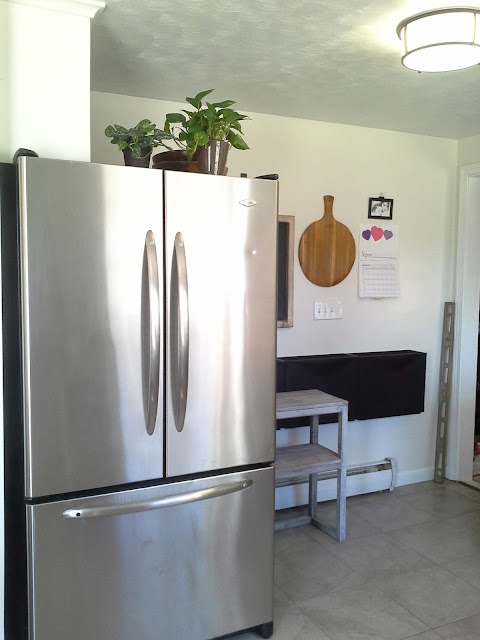
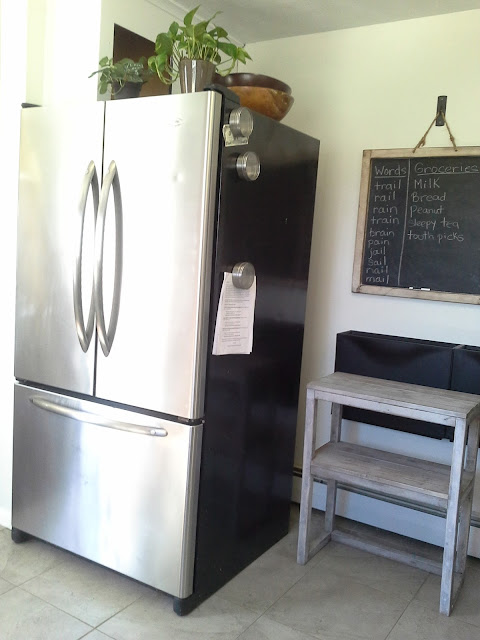
As we are working on our kitchen one big question comes to mind. What to do with the space over the refrigerator? The first thing we noticed when we did our first walk through the house is that the refrigerator was facing in the wrong direction, it just didn't feel right.
We turned it around to see how it would look, and it looks and feels so much better. The refrigerator reflects light off from the window over the sink and the kitchen looks more open which makes it feel bigger and now there's an actual triangle which makes the kitchen work so much smoother too. These simple things make a world of difference in the way that we use our kitchen.
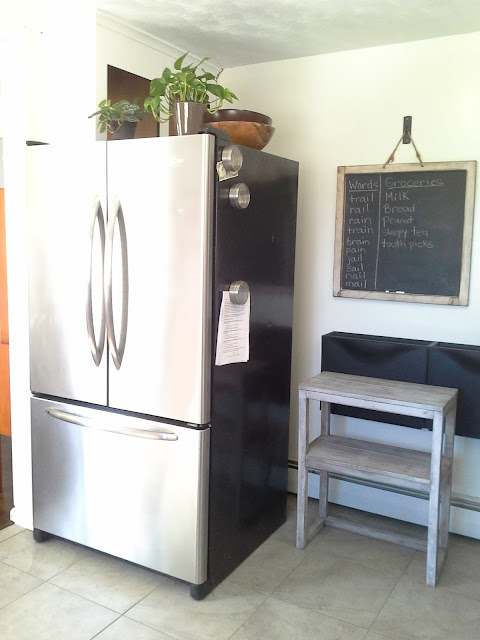
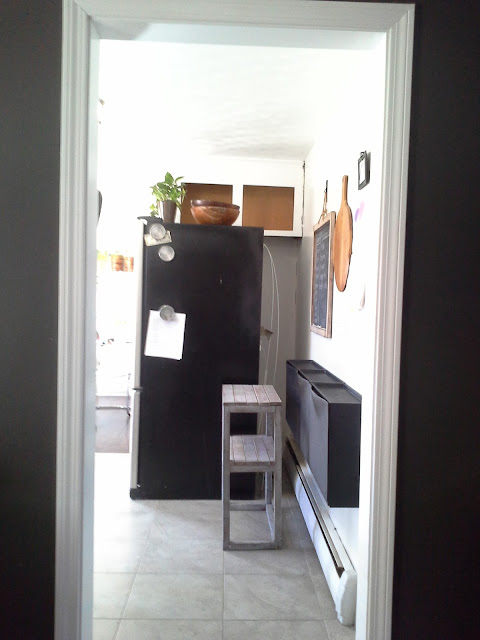
Here's the issue, now the cabinet is facing the wrong way and there's a huge gap in back of the fridge, about a foot long. The refrigerator door hinges that sit on top of the fridge bump into the cabinet and we can't recess it further back. We also have the baseboard heater behind it.
We never use the space over the fridge because it's too far back, the depth of the cabinet is too shallow. Really we just place random crap on top of the fridge and it's an eye sore.
Our plan
- Carefully remove the cabinet and trim because we are going to reuse it.
- Recess the refrigerator as far back as we can.
- Reusing the existing cabinet, turning it around and bringing it all the way forward to the front of the fridge so that we can finally access it.
- Use plywood to build a frame around the fridge and cover the space in back of the cabinet and make cutouts for the baseboard heater.
- Trim around the new built in refrigerator cabinet.
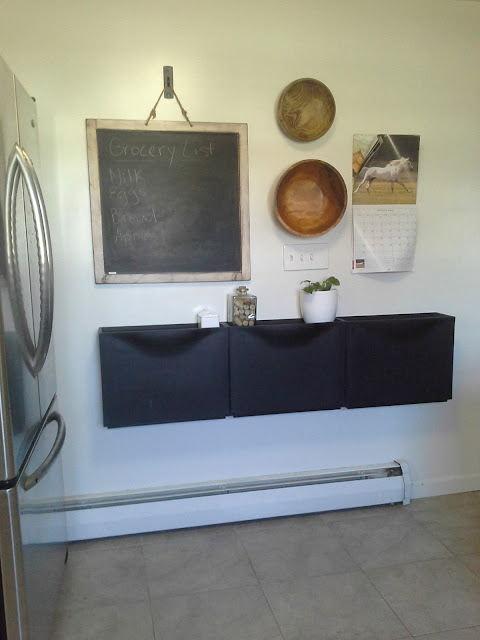
Now here's where I'm not sure what to do. Because of the baseboard heater we can't add a regular lower cabinet next to the fridge. This would have been perfect because it would give us more storage and looked more polished. I am thinking of building a floating cabinet next to the fridge, so that it doesn't interfere with the baseboard heater. Or building an open shelf style, rolling kitchen cart. Which is why I temporarily placed that table there to give us somewhat of a visual.
Right now, what we have in that space are the recycling bins, they serve their purpose well, aside from getting a little too full sometimes. We have to figure out a way to work them in, because we recycle a ton in our house. Maybe we can stack them on top of each other like we had them in our old house or move them in to the next room over, which is our home office/entryway.
This will cover the last thing in the list of the for now phase
Prime and paint the trim and ceiling semi gloss white.Sand and repaint the cabinets, the paint job was done very poorly.Change out the hardware on the cabinets.Replace the hanging light fixture over the sink with something more our style.- Do something about the wasted space over the refrigerator.
Which means we replaced the light fixture over the sink! Remember the Ikea light fixture from the Ikea kitchen wish list? We were going to wait until the spring to take a trip but a couple weeks ago we needed a brake from all the house, weekend work and instead headed over there and worked on our wish list. Some of the things on our wish list weren't available and we fell in love with some chairs that weren't in stock, so we will be taking another trip once they are back in stock.
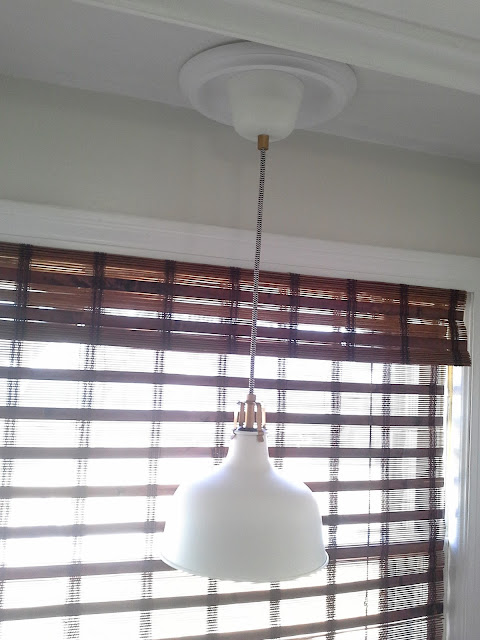 |
| Yes, I know I have to caulk around the medallion, but give me a break! |
That's what we are planning to do with the space over the refrigerator. We are very exited about this change because the flow of the kitchen will be so much better, it's also going to look a lot better once it's finished. We will be gaining a few inches of space, when we push the refrigerator back, so that's a plus and gaining storage with the cabinet over the fridge and whatever we end up doing next to the fridge. So yes, yes, yes, I can't wait to work on this!

